Channels
How to Add a website
1.Under Channels click on websites

2.Click on Add Website on the above screen
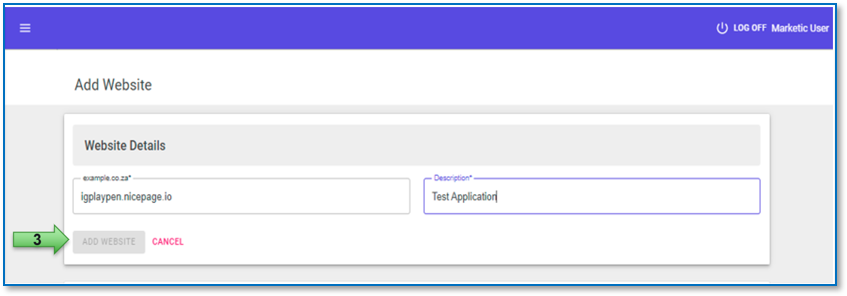
3.Enter website details and click add website
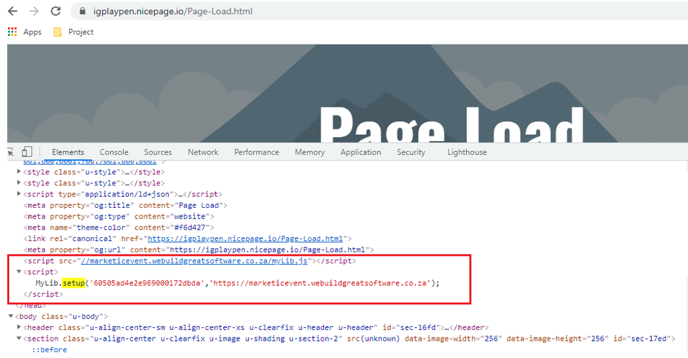
4.Copy the generated Javascript and insert on all pages of your web application that you would like engagement to happen on and click confirm integration

5.After inserting the script on the target site if you click inspect under elements you will see the script injected
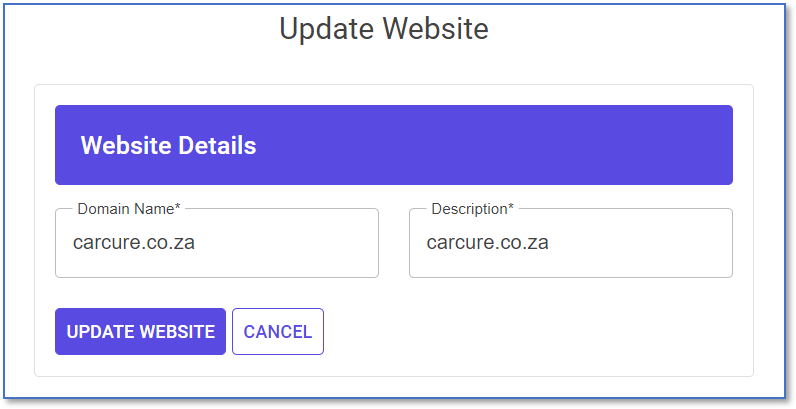
6.To update the website details click the edit icon

How to Access the Dashboard for Events and Actions
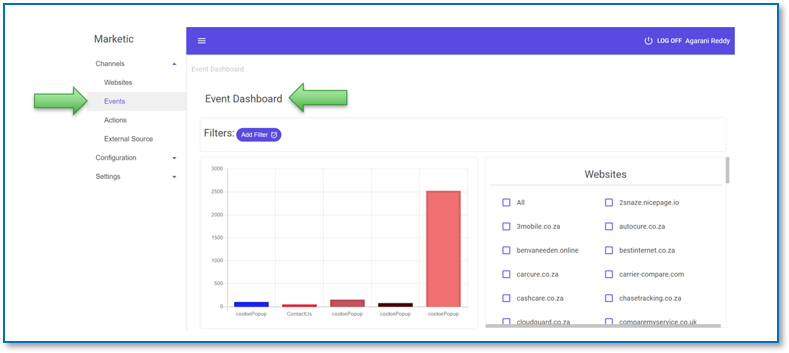
1.Click Events to access the Event Dashboard
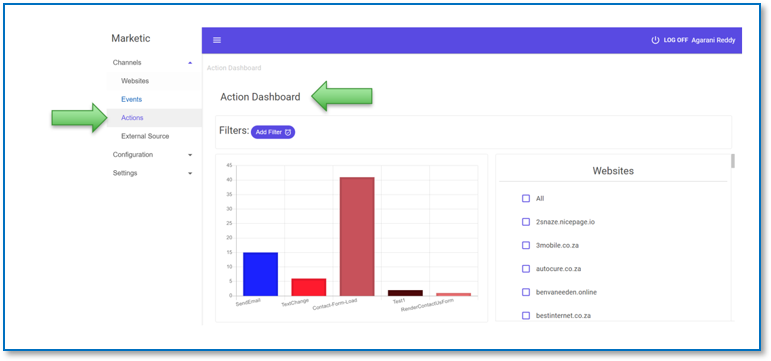
2.Click Actions to access the Action Dashboard
How to Add Events
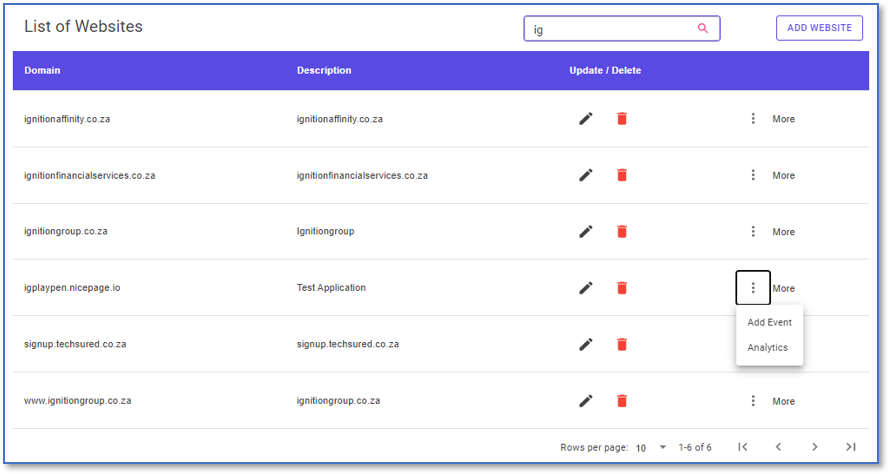
1.Click on the ellipses more punctuation mark and select Add Event or double click on the website Domain name
2.Enter Event details and click Next

You will be directed to the Add Selector Type Page, these selectors are the elements on an a target site

3.Once completing all the information click Add

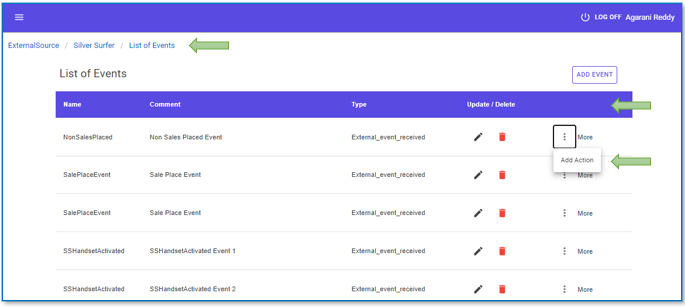
4.On the List of Events , click on the ellipses more punctuation mark and select Add Action.

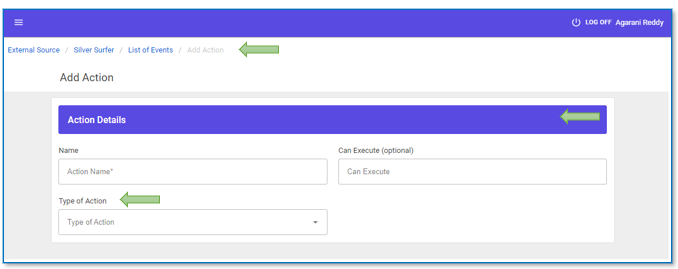
Then select type of Action, once completed click the Next button
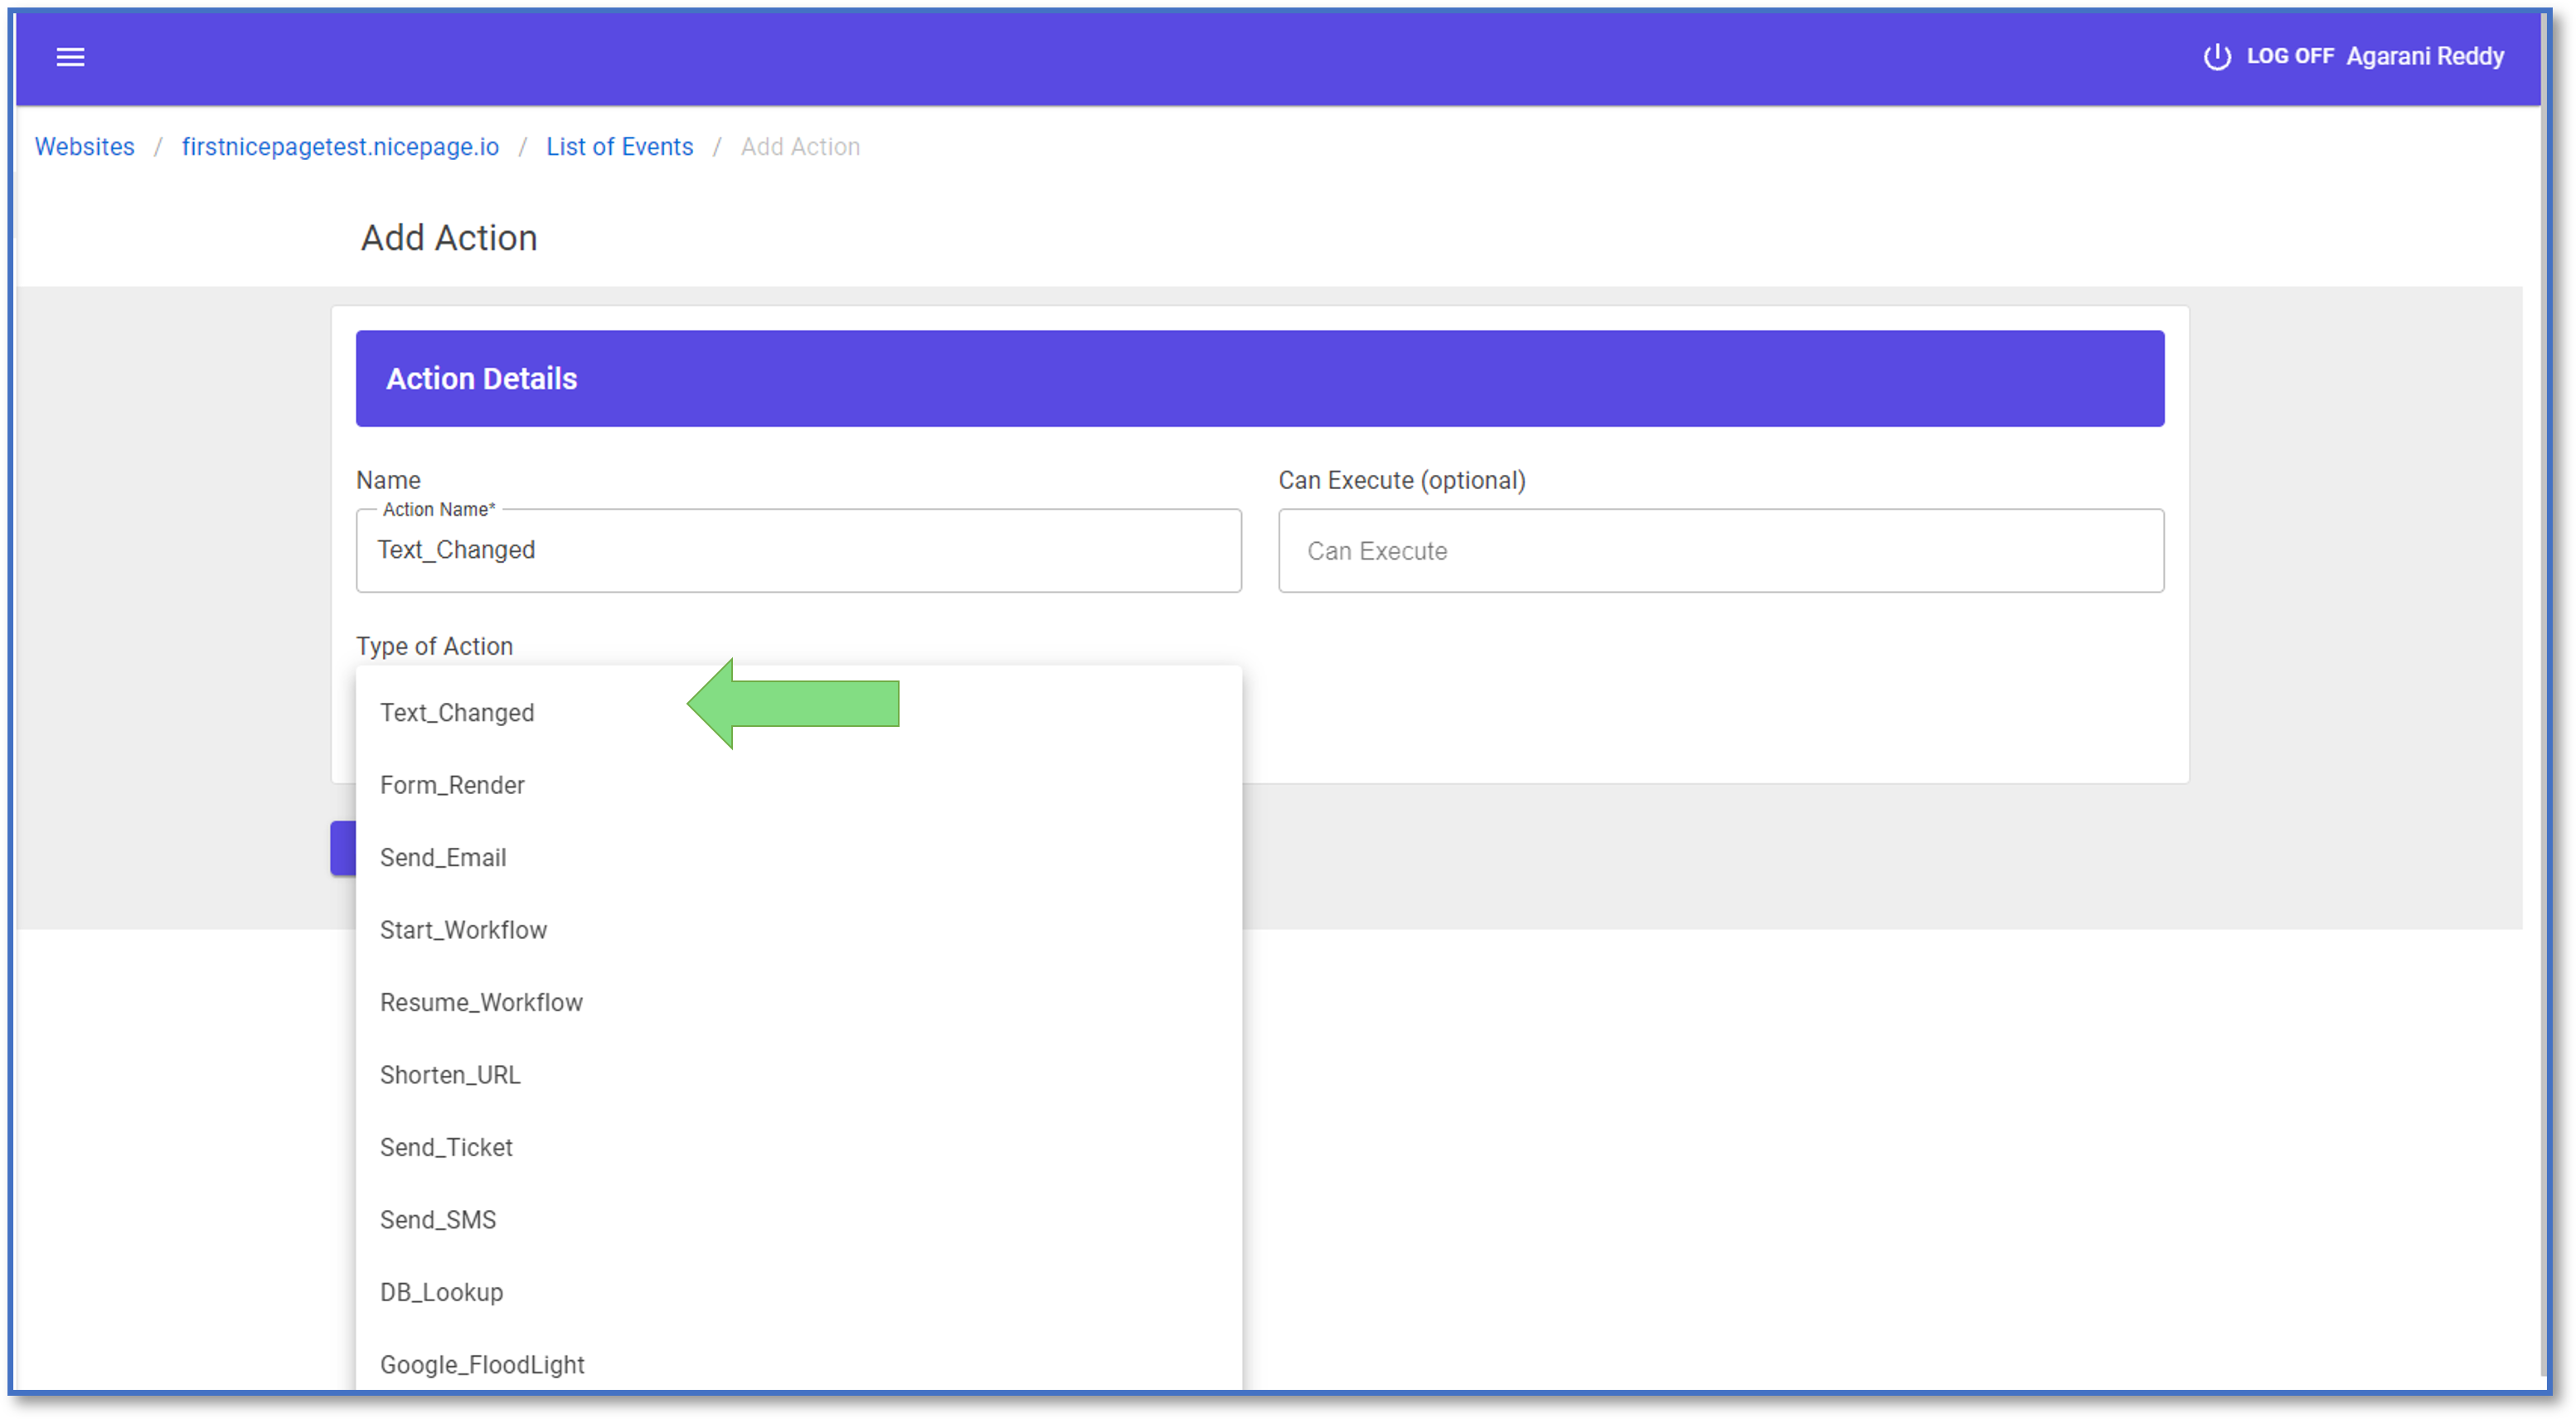
5.Add Type of Selector and click the button to save to the List of Actions

6.On the list of Actions under the draft tab you can re-order the action sequence, click on the up and down arrow to re-order the list of actions.
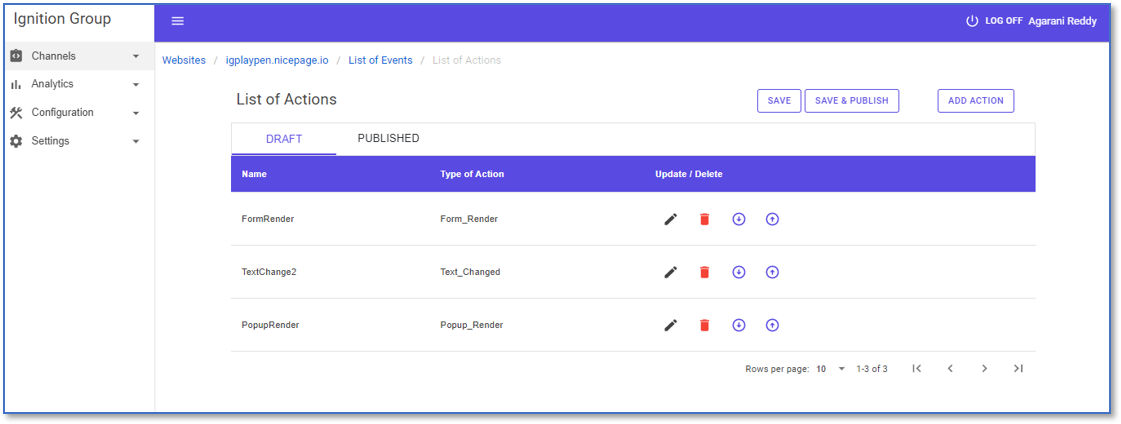
Click Save to save it to a draft if you’re still editing the list or if you have configured all your actions for that event and have organized them in the sequence you need, you can click on save & publish.
How to Add an External Source
1.Under Channels, click Add External Source

Enter Name and Description of the External Source
2.Copy the API Endpoint to add to the external source system e.g Silver Surfer
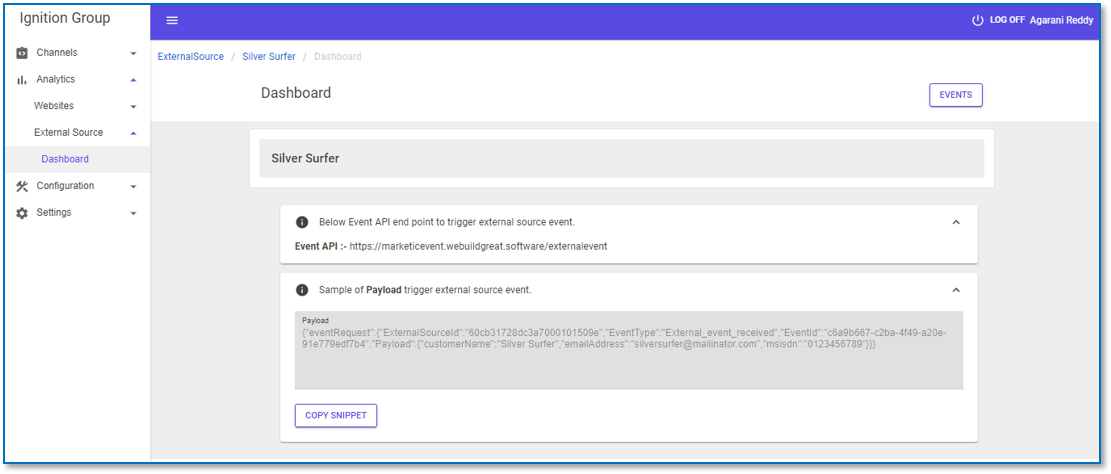
Note:
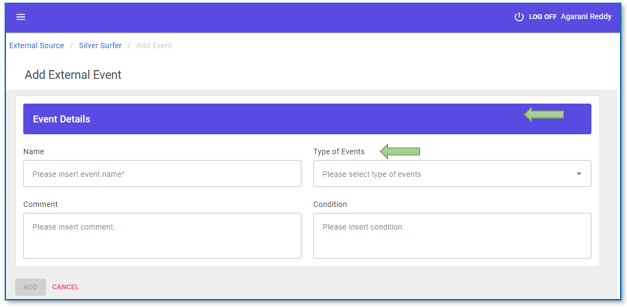
The sample payload will only appear after you have added your event.3.Click on the ellipses more punctuation mark and select Add Event

Enter Event Details, select Type of Event and click Add
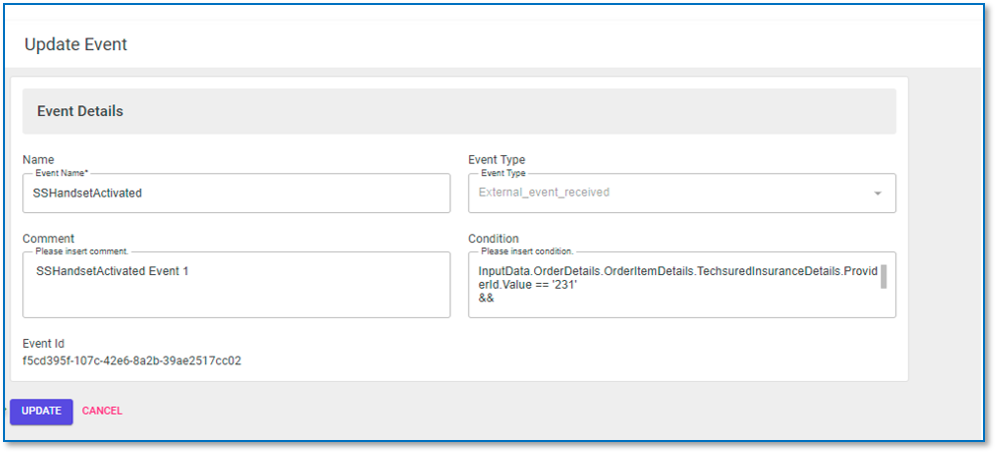
Note:
The condition field in not a mandatory field.4.The Event you created will get saved to the List of Events. Click on the ellipses more punctuation mark and select Add Event
5.Complete the Action Details and select the Type of Action you want to execute
6.Based on what Type of Action you selected e.g. Start Workflow additional fields will appear for you to complete and save
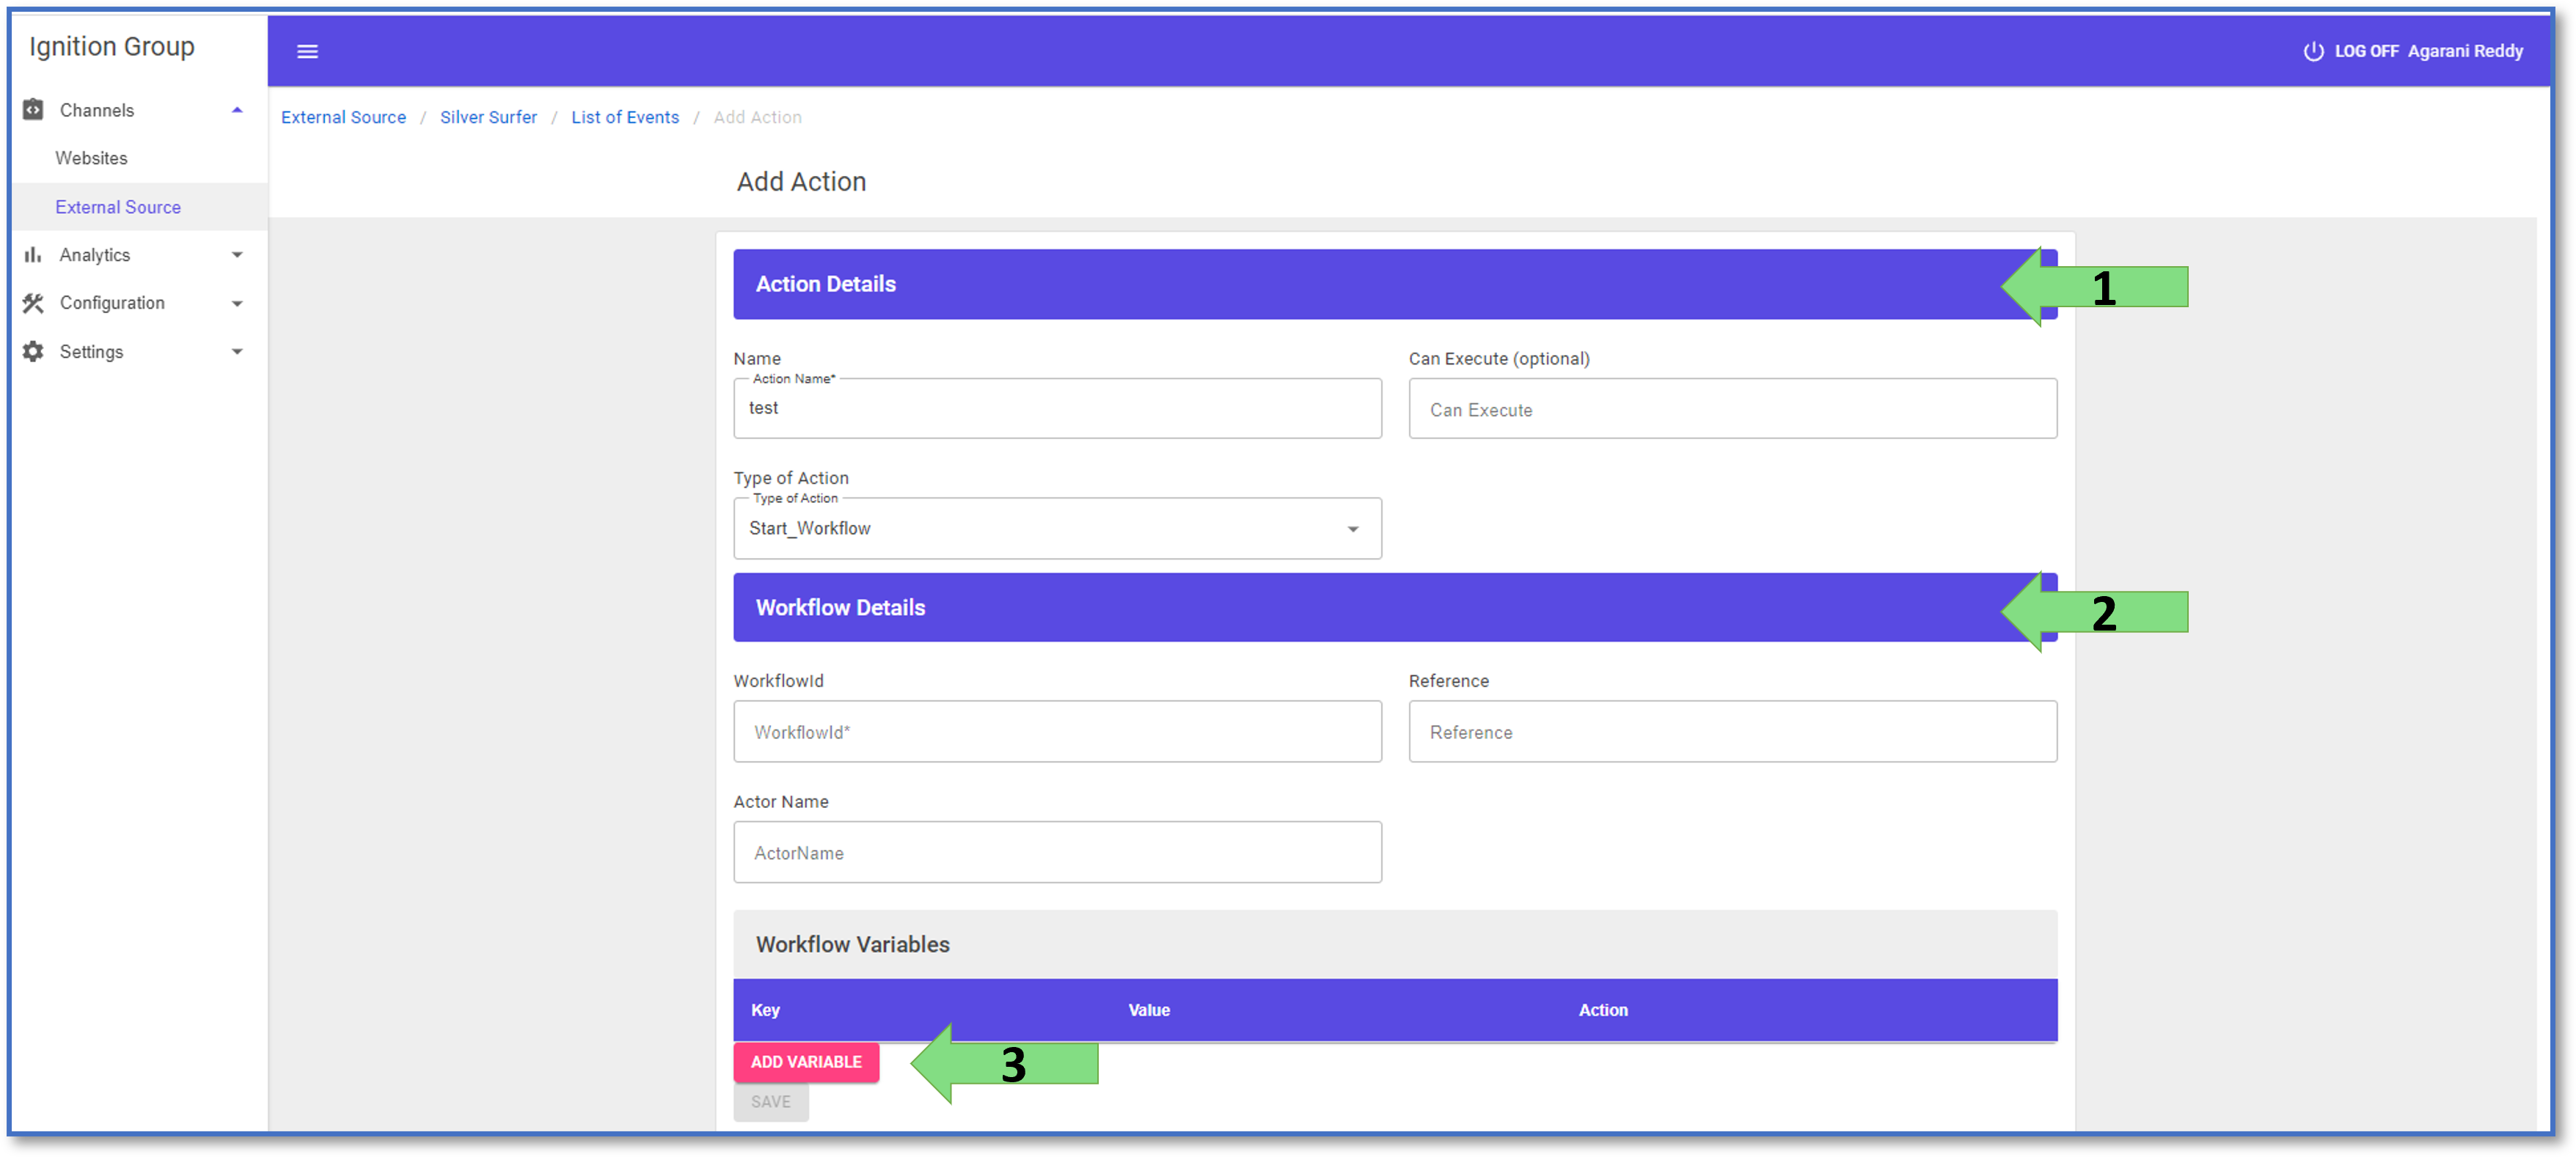
7.The action you created will now appear on the List of Actions under Draft

- Under the Draft tab, click on the up or down arrows to re-order your list of actions in the order you want it to be published in
- Click Save to save it to a draft if you’re still editing the list
- If you have configured all your actions for that event and have organized them in the sequence you need, you can click on save & publish
- The published list of actions will be carried out in that order, so if you want your draft to appear on the published action list, you must click Save & Publish first
- Re-ordering the actions added to an event lets you execute the actions in the sequence you require. An event can be paired with several actions
