Getting Started
How to use the User Management application
1.Click on User Management

2.Login to begin
You will login with your AD credentials. If you do not have a user set up, please chat to Jennisha or Anny to set your user up for you.

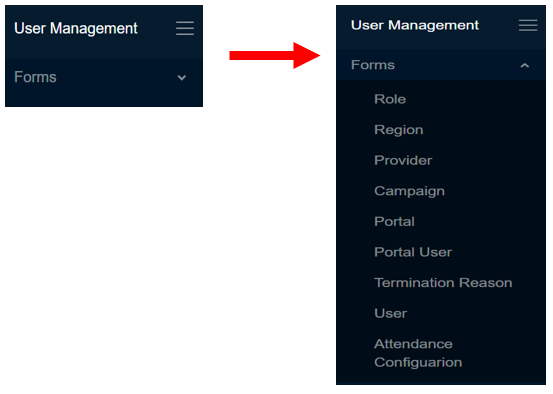
Once you have successfully logged in you will able to start creating data to make up the user details. Should you wish to logout. Click on the arrow on the right of your name on the top right hand corner of To see all the forms click on the drop down arrow on the right of ‘’Forms’’
3.Creating a Role
The first step in creating a user, would be to create a role for the user if it does not already exist
Steps to create a Role:
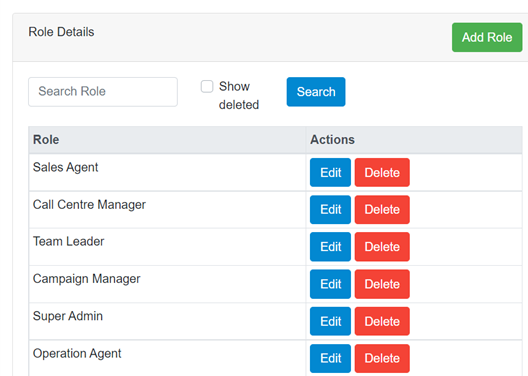
- Click on Role in the left menu bar
- Click on Add Role
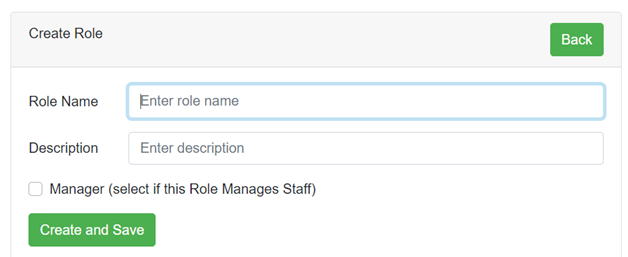
- Complete the required fields
- Role Name
- Description
- Check the tick box should this role have direct reports
- Click Create and Save
**All entries can be edited or deleted
4.Creating a Region
The next step would be to create regions in which the agents are located
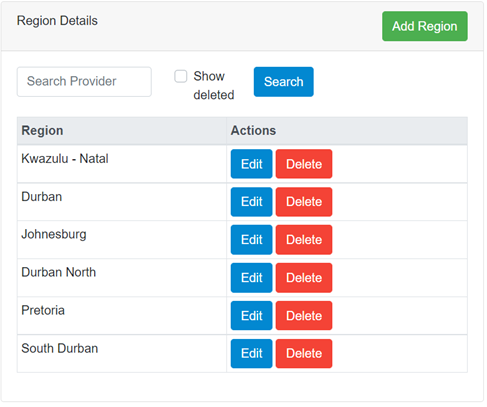
Steps to create a Region:
- Click on Region in the left menu bar
- Click on Add Region
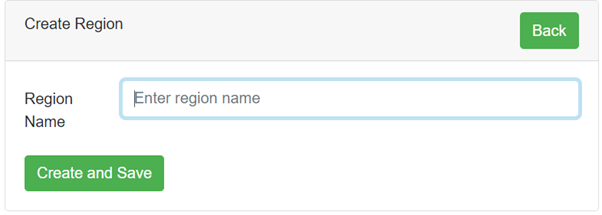
- Complete the required fields
- Region Name
- Click Create and Save
**All entries can be edited or deleted
5.Creating a Portal
Please note that we should do this step before creating a Provider even though Portal is after Provider on the left menu bar.
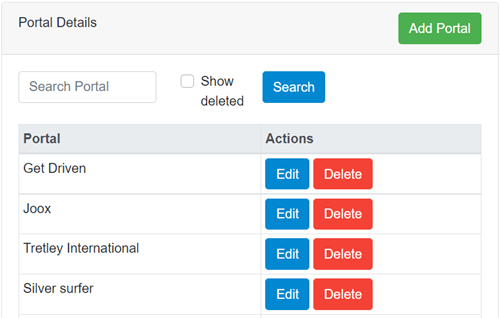
Steps to create a Portal:
- Click on Portal in the left menu bar
- Click on Add Portal
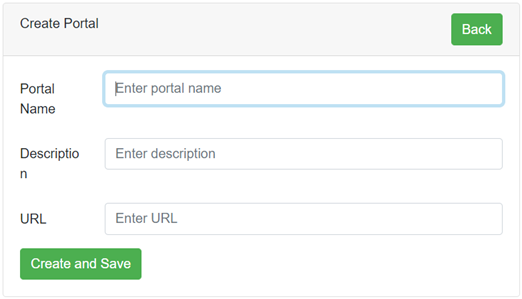
- Complete the required fields
- Portal Name
- Description
- URL
- Click Create and Save
**All entries can be edited or deleted
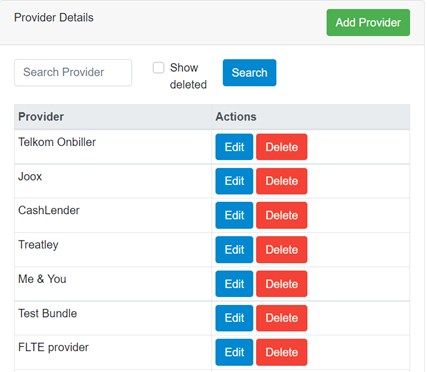
6.Creating a Provider
Please note that we should only do this step after creating a Portal, even though Provider is before Portal on the left menu bar.
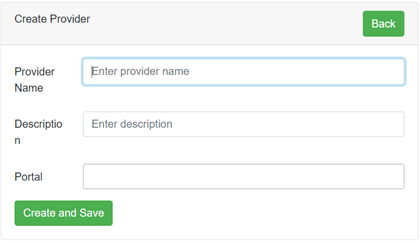
Steps to create a Provider:
- Click on Provider in the left menu bar
- Click on Add Provider
- Complete the required fields
- Provider Name
- Description
- Portal - *Portal needs to be created before provider is created
- Click Create and Save
**All entries can be edited or deleted
7.Creating a Campaign
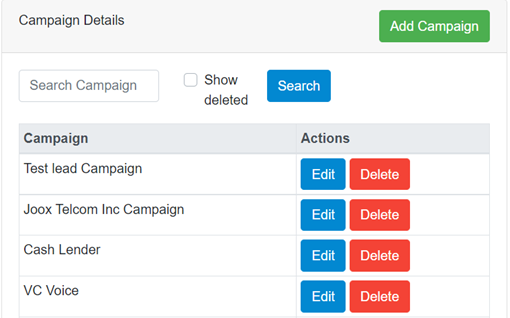
Next you can create the Campaign
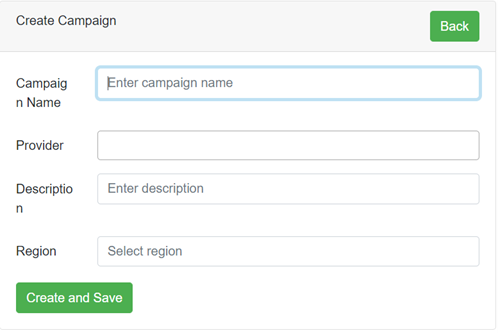
Steps to create a Campaign:
- Click on Campaign in the left menu bar
- Click on Add Campaign
- Complete the required fields
- Campaign Name
- Description
- Region - *Region needs to be created before Campaign is created
- Click Create and Save
**All entries can be edited or deleted
8.Creating a User:
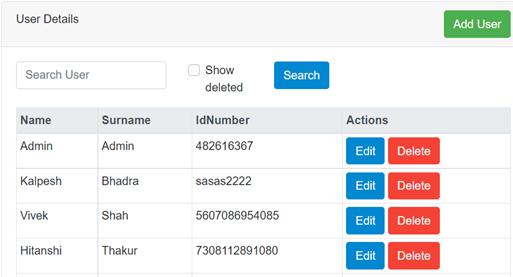
The next step would be to create a User
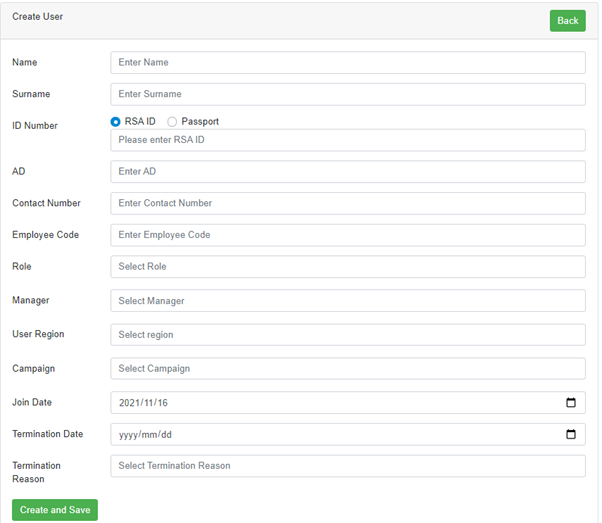
Steps to create a User:
- Click on User in the left menu bar
- Click on Add User
- Complete the required fields
- Name
- Surname
- ID/Password fields
- AD username
- Contact Number
- Employee Code
- Role - *Role needs to be created before User is created
- Manager - *this will be another User that was created before
- User Region - *Region needs to be created before User is created
- Campaign - *Campaign needs to be created before User is created
- Join Date
- Termination Date (Not required until user is terminated)
- Termination Reason (Not required until user is terminated)
- Click Create and Save
**All entries can be edited or deleted
9.Creating a Portal User
You need to create a user before creating a Portal User.
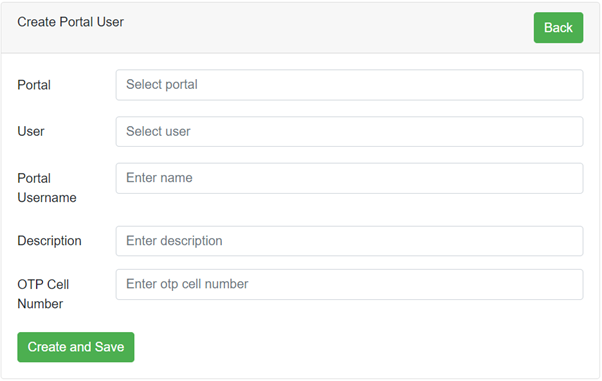
Steps to create a Portal User:
- Click on Portal Use in the left menu bar
- Click on Add Portal User
- Complete the required fields
- Portal - *Portal must be created before Portal User
- User - *User must be created before Portal User
- Portal Username
- Description
- OTP Cell Number
- Click Create and Save
**All entries can be edited or deleted

10.Attendance Configuration
User Management forms the basis of the attendance Register. Only once you have set up yours and your teams users, you can manage the attendance of each person in your team from the attendance app.
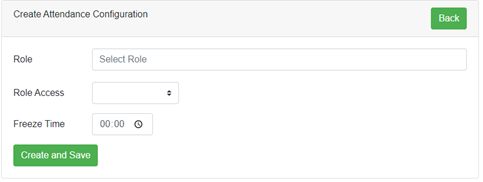
Before you go there, you can set the attendance configuration for Freeze Time under Attendance Configuration
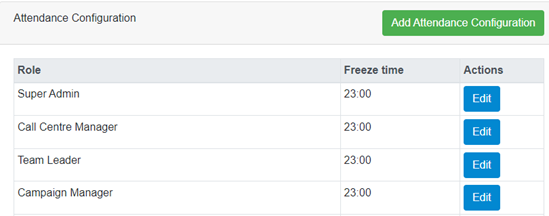
Steps to adding Attendance Configuration:
- Click on Attendance Configuration in the left menu bar
- Click on Add Attendance Configuration
- Complete the required fields
- Role - *Role must be created before adding attendance config
- Role Access
- Save - can only save attendance
- Verify - can save and verify the attendance
- Complete - can save, verify and complete the attendance
- Admin - can save, verify and complete the attendance and Also access the attendance adjustments page
- Freeze Time - *choose time in which the user can no long amend the attendances
- Click Create and Save
**All entries can be edited or deleted
11.Termination Reason
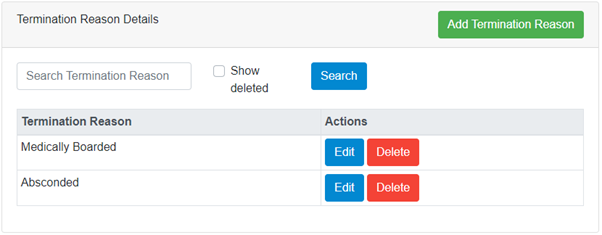
We can choose our own termination reasons to add once a user is terminated
Steps to adding Termination Reason:
- Click on Termination Reason in the left menu bar
- Click on Add Termination Reason
- Complete the required fields
- Name
- Description
- Click Create and Save
**All entries can be edited or deleted

12.Database Schema
Data is accessible from snowflake: DATAWAREHOUSE.MARKETIC_USERMANAGEMENTPROD
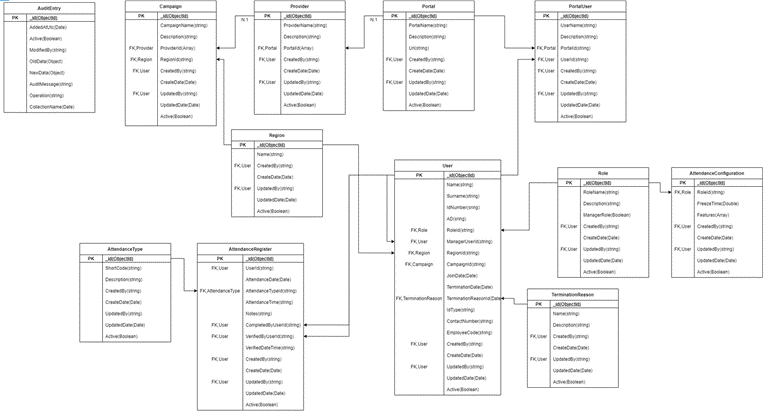
Diagram showing relationships between DB tables
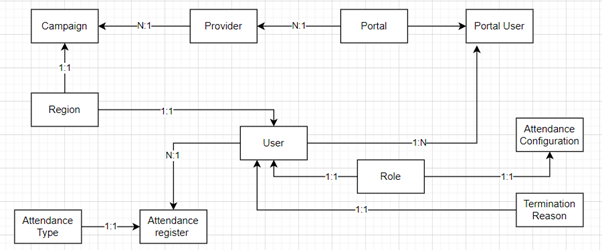
Detailed view showing relationships between tables
